

Introduction
This guide will show you how to
download and install Ubuntu Linux on Windows 10 in such a way that it won’t
harm Windows.
What You Will Need
In order to install Ubuntu Linux on
Windows 10 you will need to download the following applications:
• Oracle Virtualbox
• Ubuntu
• Virtualbox Guest Additions
Steps Required to Run Ubuntu Linux On Windows
10
1. Download Oracle Virtualbox
2. Download Ubuntu
3. Download Virtualbox Guest Additions
4. Install Virtualbox
5. Create a Ubuntu virtual machine
6. Install Ubuntu
7. Install Virtualbox Guest Additions
1. Download Oracle Virtualbox
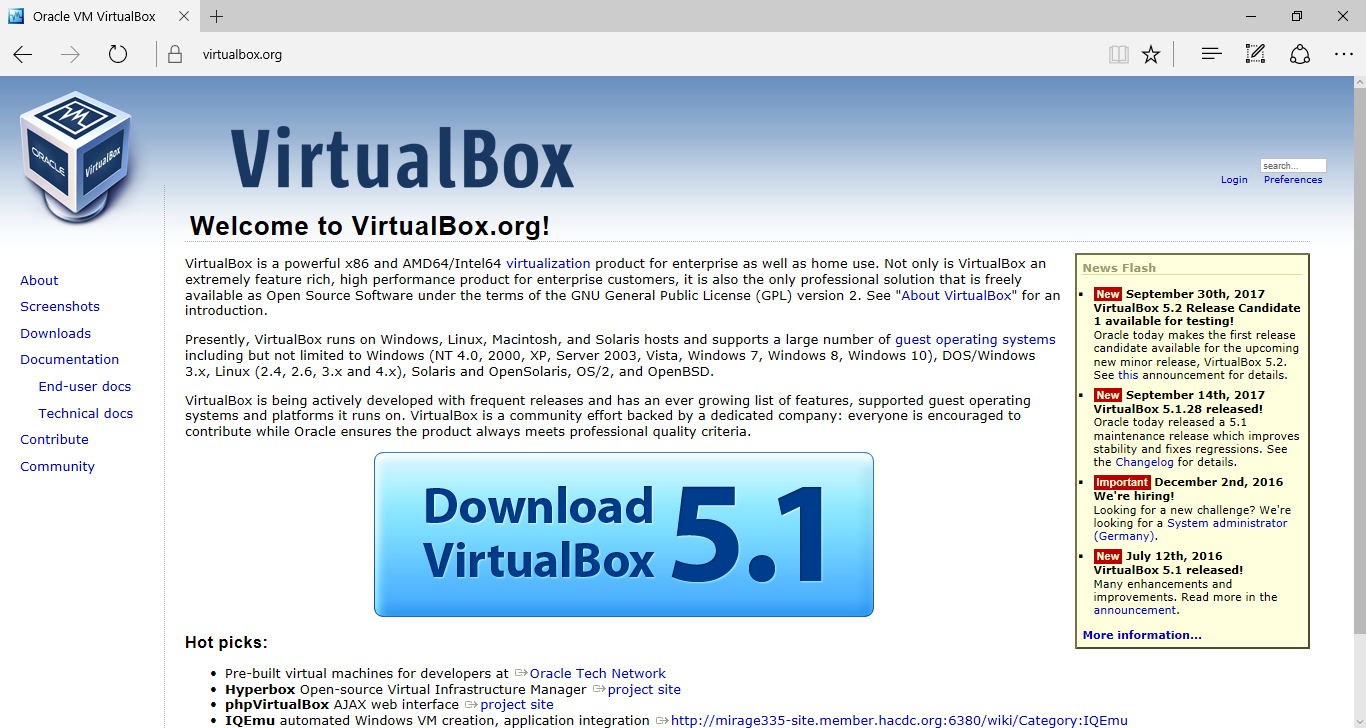
To download Virtualbox visit
www.virtualbox.org and click on the large download button in the middle of the
screen.
2. 32-Bit or 64-Bit

To find out whethe you are running a
32-bit or 64-bit system click on the Windows start button and search for PC
Info.
Click on the link for “About your PC”.
The screen that appears tells you lots
of useful information about your computer such as the amount of RAM, the
processor and the current operating system & system type too.
3. Download Ubuntu
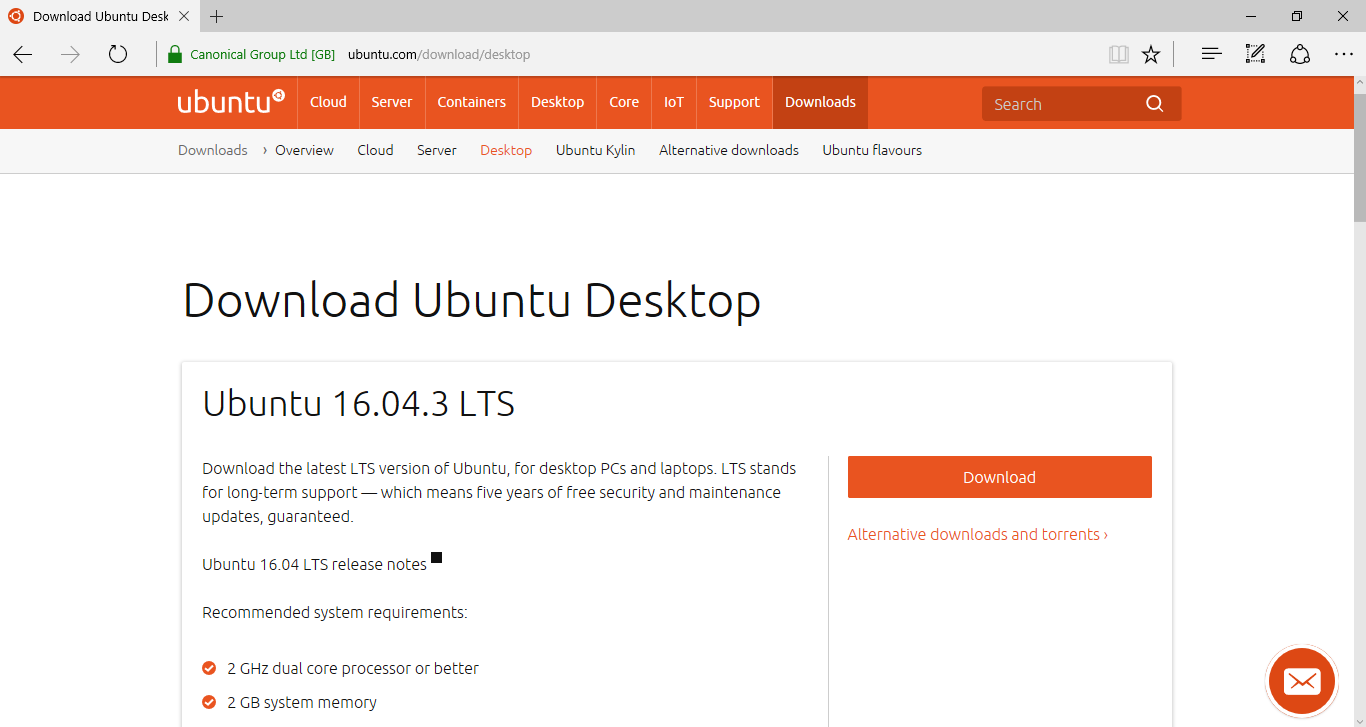
There are two versions of Ubuntu
available:
1. Ubuntu 16.04.3 LTS
2. Ubuntu 17.04
Download the latest LTS version of
Ubuntu, for desktop PCs and laptops. LTS stands for long-term support — which
means five years of free security and maintenance updates, guaranteed.
The latest version of the Ubuntu
operating system for desktop PCs and laptops, Ubuntu 17.04 comes with nine
months of security and maintenance updates.
4. Download Virtualbox Guest Additions

The guest additions makes it possible
to run the Ubuntu virtual machine in full screen mode at a suitable resolution.
To download Virtualbox Guest Additions
visit http://download.virtualbox.org/virtualbox/.
There are a lot of links on this page.
Click on the link that matches the version of Virtualbox you downloaded
previously.
When the next page opens click on the
link for VBoxGuestAdditions.iso (There will be a version number as part of the
link i.e. VBoxGuestAdditions_5_1_28.iso).
Click on the link and let the file
download.
5. Install VirtualBox
Click on the Virtualbox application
file you downloaded earlier on.
The Virtualbox setup wizard will
begin. Click on “Next” to start the installation.
The next screen lets you choose the
Virtualbox installation options.
There is absolutely no reason not to
choose the defaults unless you want to choose a different installation location
in which case click on “Browse” and navigate to where you want to install
Virtualbox.
Click “Next”to continue.
You now have the option to create
shortcuts, either on the desktop and/or the quick launch bar and whether to
register file associations such as VDI files to Virtualbox.
It is up to you whether you want to
create shortcuts. Windows 10 is really easy to navigate with the powerful
search button so you might decide not to bother creating either of the
shortcuts.
Click “Next” to continue.
A warning will appear stating that
your network connection will temporarily be reset. If this is a problem to you
right now then click “No” and come back to the guide at a later stage otherwise
click “Yes”.
You are finally at the point of
installing Virtualbox. Click the “Install” button.
A security message will appear asking
whether you are sure you wish to install Virtualbox and halfway through the
install you will be asked whether you want to install the Oracle Universal
Serial Bus device software. Click “Install”.
6. Create A Ubuntu Virtual Machine

Open VirtualBox and click on the “New”
icon on the taskbar.
7. Choose The Type of Virtual Machine

Give your machine a name. Personally I
think it is a good idea to go for the Linux distribution name (i.e. Ubuntu).
Select “Linux” as the type and
“Ubuntu” as the version. Make sure you choose the correct version based on
whether you have a 32-bit or 64-bit machine.
Click “Next” to continue.
8. How Much Memory Do You Give Your
Virtual Machine

You now have to choose how much of
your computer’s memory you will assign to the virtual machine.
You cannot assign all of your
computer’s memory to the virtual machine as you need to leave enough for
Windows to continue running as well as any other programs that you have running
within Windows.
The minimum you should consider
assigning to Ubuntu is 2 gigabytes which is 2048 MB. The more you can give the
better but don’t go overboard
Slide the slider to the amount you want to assign and click “Next”.
9. Create A Virtual Hard Drive


After assigning memory to the virtual
machine you now have to set aside some hard drive space. Select the “Create a
virtual hard disk now” option and click “Create”.
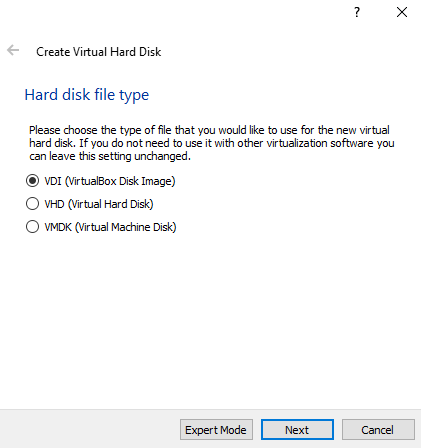
There are a number of different hard
drive types that you can choose from. Choose “VDI” and click “Next”.

There are two ways to create the
virtual hard drive:
1. Dynamically
allocated
2. Fixed
size
If you choose dynamically allocated it
will only use space as it is required. So if you set 16 gigabytes aside for the
virtual hard drive and only 6 is required then only 6 will be used. As you
install more applications the extra space will be allocated as necessary.
This is more efficient in terms of
disk space usage but isn’t so good for performance because you have to wait for
the space to be allocated before you can use it.
The fixed size option allocates all
the space you request straight away. This is less efficient in terms of disk
space usage because you may have set aside space you never actually use but it
is better for performance.
Choose the option you prefer and click
“Next”.
10. Set The Size Of Your Virtual Hard
Drive

Finally, you are at the stage of
setting how much space you wish to give to Ubuntu. The minimum is about 16 gigabytes but the more you can spare the better. You don’t have to go overboard
though. If you are just installing Ubuntu in a virtual machine to test it out,
go for a smaller amount.
When you are ready click “Create” to
continue.
11. Install Ubuntu On Your Virtual
Machine

The virtual machine has now been
created.
The first thing to do is to boot into
Ubuntu. Click the start icon on the toolbar.
This is the point where you need to
choose the Ubuntu ISO file you downloaded earlier. Click on the folder icon
next to the “Host Drive” drop-down.
Navigate to the download folder and
click on the Ubuntu disc image and then on “Open”.
12. Start The Ubuntu Installer

Click on the “Start” button.
Ubuntu should load into the little
window and you will have the option to try Ubuntu or install Ubuntu.
Click on the “Install Ubuntu” option.
13. Check Your Virtual Machine Meets
The Pre-requisites

A list of pre-requisites will be
displayed. Basically you need to make sure your machine has enough power (i.e.
plug it in if you are using a laptop), has over 6.6 gigabytes of disk space and
is connected to the internet.
You also have the option of
downloading updates whilst installing and to install third party software.
If you have a good internet connection
check the download updates option otherwise untick it and leave the updates to
install at a later point post installation.
I recommend checking the install third
party software option as it will allow you to play MP3 audio and watch Flash
videos.
Click “Continue”.
14. Choose The Installation Type

The next step lets you decide how to
install Ubuntu. As you are using a virtual machine select the “Erase disk and
install Ubuntu” option.
Do not worry. This will not erase your
physical hard drive. It will just install Ubuntu in the virtual hard drive
created earlier on.
Click “Install Now”.
A message will appear showing you the
changes that will be made to your disk. Again this is only your virtual hard
drive and so it is safe to click “Continue”.
15. Choose Your Location

You will now be required to choose
where you live. You can either select the place on the map or type it into the
box available.
Click “Continue”.
16. Choose Your Keyboard Layout

The step is to choose your keyboard
layout.
You may find that the correct layout
has already been chosen but it isn’t try clicking on the “Detect Keyboard
Layout” option.
If that doesn’t work, click on the
language for your keyboard in the left panel and then choose the physical
layout in the right pane.
Click “Continue”.
17. Create A User

The final step is to create a user.
Enter your name in to the box provided
and give your virtual machine a name.
Now choose a username and enter a
password to associate with that user. (repeat the password as required).
The other options are to log in
automatically or require a password to log in. You can also choose to encrypt
your home folder.
As it is a virtual machine you may as
well go for the “Log in automatically” option but I usually recommend always
selecting the “Require my password to log in”.
Click “Continue”.
Ubuntu will now be installed.
When the installation has finished
click the File menu and choose close.
You have the option to save the
machine state, send the shutdown signal or power off the machine. Choose power
off the machine and click OK.
18. Install Guest Additions

The next step is to install the guest
additions.
Click on the settings icon on the
VirtualBox toolbar
Click on the storage option and then
click on IDE and choose the little circle with a plus symbol icon which adds a
new optical drive.
An option will appear asking you to
choose which disk to insert into the optical drive. Click on the “Choose disk”
button.
Navigate to the downloads folder and
click on the “VBoxGuestAdditions” disc image and select “Open”.
Click “OK” to close the settings
window.
When you are back at the main screen
click the start button on the toolbar.
19. Open The VirtualBox Guest
Additions CD In Ubuntu

Ubuntu will boot for the first time.
Click on the CD icon at the bottom of
the launcher panel on the left and make sure there are files for VirtualBox
Guest Additions.
Right click on an empty space where
the list of files are and choose open in terminal.
20. Install Virtualbox Guest Additions

Type the following into the terminal window:
sudo sh ./VBoxLinuxAdditions.run
Finally, you need to reboot the
virtual machine.
Click on the little cog symbol in the
top right corner and choose shutdown.
You will be given the choice to
restart or shutdown. Choose “Restart”.
When the virtual machine restarts
choose the “View” menu and select “Full Screen Mode”.
A message will appear telling you that
you can toggle between full screen and windowed mode by holding down the right
CTRL key and F.
Click “Switch” to continue.
Now your Ubuntu is ready to use.


No comments:
Post a Comment